Setting Up Your Steam Deck the Right Way (According to Me)
From emulation to non-Steam games and everything in between, this is the definitive guide to setting up your new Steam Deck (if it were my Steam Deck).
I remember logging into Steam on July 15, 2021, and seeing it. It was glorious. A gaming PC in the palm of your hands. And it runs linux? This was the stuff dreams are made of, but it was real. Valve had announced the Steam Deck. I also remember rushing back onto steam to pre-order my 64GB Steam Deck before the scalpers grabbed them all, but that's a story for another time.
Three and a half years later, Valve has not only released an OLED version of the Deck but also two limited-edition variants. I upgraded to the OLED because I couldn't resist the display and the translucent case, but the improved battery life is the main reason I recommend it today.
I've tried so many different software tools and "hacks" on the Steam Deck that it's almost hard to keep track of, but as the holiday season approached, I started to hear rumblings of my friends getting Steam Decks of their own. Immediately, I decided to jot down a couple of bullet points of things they may want to try out. When I took my hands off the keyboard a few hours later, I realized I had written a 9-page document. I shared it on r/steamdeck, and the positive response was actually a huge motivator for me to create this website, so it only makes sense that it should live here in some form for the rest of its life.
Without further ado, the definitive (for me) guide to setting up a Steam Deck.
If all you care about is my recommended accessories, just click here
But First, a Disclaimer
When I posted this guide to Reddit, there were a lot of excellent suggestions, many of which will be in this guide. One thing that I didn't make clear that time, is that this is a very opinionated guide, meaning this is how I would set up a brand new Steam Deck. Now, that's not to say I won't take any suggestions. It just means even if your suggestion is great for you, it may not be good for me, and therefore doesn't belong in this guide. Okie dokie, let's start for real this time.
General Tips
This part may seem a bit booring, but I think it's important because what I call the "start button" you may call something else.
Buttons, Buttons, Buttons
Select - The button with the two overlapping boxes to the top left of the screen
Start - The button with the three horizontal lines to the top right of the screen
Steam - The button that says “Steam” to the bottom left of the screen
Quick Access Menu (QAM) - The button with the three dots to the bottom right of the screen
Also, the buttons on the back are labeled R4, R5, L4, and L5. You can configure those to do whatever you want on a game to game basis, just like any other button on the Steam Deck. To do that, while in game click:
Steam -> The game you're playing -> Controller Settings -> Controller Settings -> Edit Layout
You really can configure any button to do anything. You can even put radial menus on the trackpads!
Desktop Mode Is Not Your Enemy
As an enthusiast, this sounds like a no-brainer, but I was surprised by how many of my friends either didn't know about desktop mode or just wrote it off entirely. When you're in desktop mode, you're no longer holding a "switch-like gaming handheld." You're holding an entire computer with a fully featured desktop. For the uninitiated, to get to desktop mode you click:
Steam -> Power -> Switch to Desktop
You can use this for anything ranging from simple tasks like browsing the web, to something more complex like running a script in terminal, or really anything you can use a normal computer for (including installing apps like Discord and Spotify).
Some tips for using desktop mode:
- Clicking "X" will bring up the on-screen keyboard
- Rotating your thumb on the left trackpad will act like a mouse scroll wheel. Clockwise for down and counter-clockwise for up.
Back to Gaming
As much as I love desktop mode for its utility, even I spend most of my time in gaming mode. To get back to gaming mode from desktop mode you can either double-click the "Return to Gaming Mode" icon on the desktop, or if you can't do that for some reason, restarting the Steam Deck will always bring you back to gaming mode.
System Settings
When I get a new device, I go straight into the settings to see if it can do anything I didn't know about before. If we're the same type of weird in this way, you should skip this step so you can explore for yourself. For everyone else, here are the settings I would change right away.
In the general tab of settings, there's a pretty self-explanitory option called "Battery Percentage" that will show you a numeric percentage representing how much juice you have left in the tank. I set that to on.
Under security, you can set a 6-digit security pin. If you have any money in your Steam wallet or any payment methods saved to your Steam account, please turn this on. If your deck is stolen, it will give you some extra time to lock your account down before the thief gifts themselves every game on their wishlist at your expense.
This one is just personal preference (more than the others), but in the display settings, theres a Status LED Brightness slider. I set mine to 50% so I can charge the deck at night. I appreciate Valve using quality parts in their hardware, but this thing feels like it's the brightest thing in existence when it's on in a dark room.
Tools and Software
Now for the fun stuff. Until now, this post was mostly quality-of-life tips, but these have the potential to completely change the way your deck looks, the way you shop for games, and even the games you play.
Decky Loader

Decky Loader is a plugin manager for the Steam Deck. It contains many useful plugins for the Steam Deck, many of which we'll talk about later. It adds an icon to the bottom of your quick access menu which lets you access all of your plugins, as well as a plugin shop straight from gaming mode. It's a super easy process to install and can be completed in 10ish minutes I won't go into how to install it, since the software could change and then this guide would be useless, so instead I'll link you to their official documentation.
Sometimes, a Steam Deck update will break Decky Loader. Don’t worry. nine times out of ten this is fixed quickly by the makers of Decky Loader with an update of their own. Just double-click the “Install Decky” app on your desktop and it will update Decky Loader for you.
ProtonDB Badges

This one is a Decky Loader plugin, so naturally, installing that is a requirement for this.
Steam’s “Steam Deck Verified” program, although appreciated, isn’t without its flaws. There have been numerous times when a game is marked as "Great on Deck" when in reality you get under 30 fps for the majority of the experience. Here's an example of people discussing exactly that.
However, way, way, way more often are the games that are listed as "Playable" or "Unsupported" when in practice they play great on the Steam Deck.
This plugin aims to give you better insight on how games in your library work on Linux by adding a badge in a customizable location to the game page based on its ProtonDB rating. ProtonDB is a site that uses community feedback to rank how well games play on Linux, and now they have a tab for how games run specifically on the Steam Deck too.
To install, from Gaming Mode:
- Click the QAM button
- Select the tab for Decky (it should be on the bottom and look like an electrical plug)
- Select the icon in the top-left of the menu that looks like a small shop
- “Open Decky Store”
- Search for “ProtonDB Badges”
- Click install
To configure this plugin, also from Gaming Mode:
- Click the QAM button
- Select the tab for Decky (it should be on the bottom and look like an electrical plug)
- On the right, select “ProtonDB Badges”
- Select your badge size and position (I recommend small and top left respectively)
SteamGridDB

SteamGridDB is another DeckyLoader plugin, so that would be a requirement again.
SteamGridDB allows you to change the artwork for any game in your Steam Library. This is useful at face value to make your collection more personal to you, but it really comes in handy when adding Non-Steam games to your Steam Library (I promise we'll cover that in a bit).
To install, from Gaming Mode:
- Click the “QAM” controller button
- Select the tab for Decky (it should be on the bottom and look like an electrical plug)
- Select the icon in the top-left of the menu that looks like a small shop to
- “Open Decky Store”
- Search for “SteamGridDB”
- Click install
To use, from Gaming Mode:
- Hover over any game in your library
- Press the “Start” controller button
- Select “Change Artwork…” (if this doesn’t show up, press “B” then “Start” again)
- Choose any art you like for your game.
Animation Changer
Yet another Decky Loader plugin. This one is a bit more niche, but I think it's a fun one. It lets you change your startup and shutdown animations to something custom. There are a bunch available to download right in the plugin, including some nostalgic ones.
To install, from Gaming Mode:
- Click the “QAM” controller button
- Select the tab for Decky (it should be on the bottom and look like an electrical plug)
- Select the icon in the top-left of the menu that looks like a small shop to “Open Decky Store”
- Search for “Animation Changer”
- Click install
CSS Loader
The last Decky Loader plugin, I promise. But this one is pretty cool if I do say so myself. It allows you to change the theme of your Steam Deck to anything you want. You can even make your own themes if you're into that sort of thing, but there are plenty to choose from in the plugin store (don't worry they're all free). I use this to remove distractions from the Steam Deck UI, but you can use it to make it look however you want.
To install, from Gaming Mode:
- Click the “QAM” controller button
- Select the tab for Decky (it should be on the bottom and look like an electrical plug)
- Select the icon in the top-left of the menu that looks like a small shop to “Open Decky Store”
- Search for “CSS Loader”
- Click install
EmuDeck

This might be my favorite recommendation on this list. Before getting the steam deck, I dabbled in retro game emulation, but I'd be shocked if I spent more than an hour actually playing those games (although not shocked if the setup took that long). EmuDeck changed that for me completely. It's an application that sets up a bunch of emulators for you. You still have to provide the ROMs and BIOS files yourself, but it's a one-click install for the emulators themselves. It even has a built in scraper to get box art and descriptions for your games. It's super easy to install and get gaming, but a bit of a process to get everything looking great.
In my opinion, you should really have an SD Card for this. It makes it so much easier on the eyes when you don't see all that storage being taken up by ROMs on your main drive. That being said, it will definitively work on the main drive if you don't have an SD Card. I won't be going into much detail here about how to install this because Retro Game Corps does such a good job of explaining it in his video, which I'll include below. It is quite lengthy, but it's worth it (maybe try 1.5x speed). If you want something even more in depth, his written guide is also great. I will, however, be going over some of the settings and my recomendations for them here.
EmuDeck allows you to choose between three different frontends: EmulationStation, Pegasus, and SteamGridDB. I personally use EmulationStation and I recomend it for large libraries (more than 5 games), or Steam ROM Manager for small libraries. Here's a rundown of all three.
| Pros | Cons | |
|---|---|---|
| Steam ROM Manager | Integrates with Steam, No separate app to launch a game | Can be difficult to setup, Can clutter Game Mode if you have too many ROMs - No game metadata |
| Emulation Station | All ROMs in one app, Lots of themes to choose from, Can be setup to scrape game metadata and art automatically | Have to launch Emulation Station before launching a game |
| Pegasus | All ROMs in one app, Interesting filters to display ROMs in, Can be setup to scrape game metadata and art automatically | Have to launch Pegasus before launching a game, Not as much community support as EmulationStation |
(Yuzu or Ryujinx) and 3DS (Citra) emulators are no longer officially available. You can still find them online, but I will not be providing links to them here. The process for adding these files is:
- Move the Appimage files to $HOME/Applications
- Open EmuDeck and reset the settings for Citra and Yuzu
- That should be it according to this blog post
ProtonUp-Qt

The way the Steam Deck works is by using a compatibility layer called Proton. Proton is a fork of Wine, which is a compatibility layer for Windows applications on Linux. ProtonUp-Qt is a tool that allows you to update Proton versions on your Steam Deck. This is useful because Steam cannot pack in some distributables to the standard Proton due to copyright, but the community can and does in something called Proton GE.
Installation:
- In Desktop Mode, open “Discover”
- Search for “ProtonUp-Qt”
- Install
Heroic Games Launcher

I promised we would get to Non-Steam games, and I meant it. Heroic Games Launcher is a launcher for the Epic Games Store, GOG, and Prime Gaming. All of these launchers do not have a linux client, but Heroic Games Launcher allows you to play games from all of them. It can even add it to your Steam library, so you can play these games directly from Game mode. You have to install Heroic Games Launcher from Desktop mode, but we can then add that as a Non-Steam game too, so you can launch it from Game mode. Personally, I prefer to buy most of my games from Steam, but some are exclusive to other platfors, and you cant beat Epic's free games.
Installation:
- In Desktop Mode, open “Discover”
- Search for “Heroic Games Launcher”
- Install
Adding Heroic Games Launcher as a Non-Steam Game (for access in gaming mode):
- Open Steam
- Navigate to your library
- In the bottom left, click “Add a Game”
- Click “Add a Non-Steam Game”
- Find “Heroic Games Launcher”
- Click “Add Selected Program”
Now you can access the Heroic Games Launcher from Gaming Mode.
Fun Fact: Versions of Heroic Games Launcher are named after One Piece characters. For example, v2.13 is named “Dorry and Broggy”.

Recommended Accessories
Just for clarity's sake, all of the Amazon links are affiliate links. I don't make much money off of them, but I do make some. If you don't want to use them, just search the product name on Amazon and you'll find it.
SD Cards
Really, any quality SD card will do. At a minimum I would get one rated with the designation A1, as these cards should be as fast
as the steam deck’s SD card slot. I almost always get the SanDisk cards for all my devices, since I know they’ve been reliable for
me and a bit faster, but I’ve also had good luck with the PNY card listed. I recomend going with a size that's one step below what
you think you'll need. I thought I'd need 512GB, but I'm glad I went with TB in the end. Click on the size you want below to use my
affiliate link, or just searcg the product name on Amazon. Prices are at time of writing.
| Brand | Size | Speed | Price |
|---|---|---|---|
| PNY | 128GB | A1 (100MB/s) | $12.99 |
| PNY | 256GB | A1 (100MB/s) | $17.99 |
| PNY | 512GB | A1 (100MB/s) | $32.99 |
| SanDisk | 128GB | A2 (190MB/s) | $16.04 |
| SanDisk | 256GB | A2 (190MB/s) | $22.99 |
| SanDisk | 512GB | A2 (190MB/s) | $39.99 |
| SanDisk | 1TB | A2 (190MB/s) | $91.99 |
| SanDisk | 2TB | A2 (190MB/s) | $209.99 |
Internal Storage
When I got my first Steam Deck, I bought a 64GB model and a 1TB SSD at the same time. My thought process was that I would save some money by getting a lower storage model and then upgrading it myself, I'd have an excuse to take a look at what the inside of the Deck looked like, and I'd have a spare 64GB SSD for some other future project. I was right on all accounts. If you ever want to upgrade your storage, it's dead simple. Here's a guide from iFixIt showing the exact process. Just in case you want to take the same path as me, I'll add some links to SSDs here. I'm not going to list any of the no name SSDs because honestly, I don't trust them to last or even work properly from the start.
| Model | Size | Advertised Speed | Price |
|---|---|---|---|
| WD_Black | 1TB | 5150MB/s | $99.99 |
| WD_Black | 2TB | 5150MB/s | $179.99 |
| Corsair MP600 Mini | 1TB | 5000MB/s | $179.99 |
| Corsair MP600 Mini | 2TB | 5000MB/s | $179.99 |
| Sabrent Rocket | 1TB | 4750MB/s | $99.99 |
| Sabrent Rocket | 2TB | 4750MB/s | $219.99 |
Hard Case

The JSAUX ModCase is my go to recommendation. It offers great protection, good grip, a kickstand, and most importantly for me, a hard cover for the screen and thumbsticks when travelling. It’s really just a knock off of the DBrand Killswitch case, but after using both I can say with certainty that they’re both of high quality. Plus, the case is modular for use with other accessories like battery holders, a portable dock, and more.
At the time of writing, the JSAUX ModCase is $29.99.
My girlfriend recently got this $9.99 JSAUX Softcase for her SteamDeck and she's been loving it.
Carrying Case
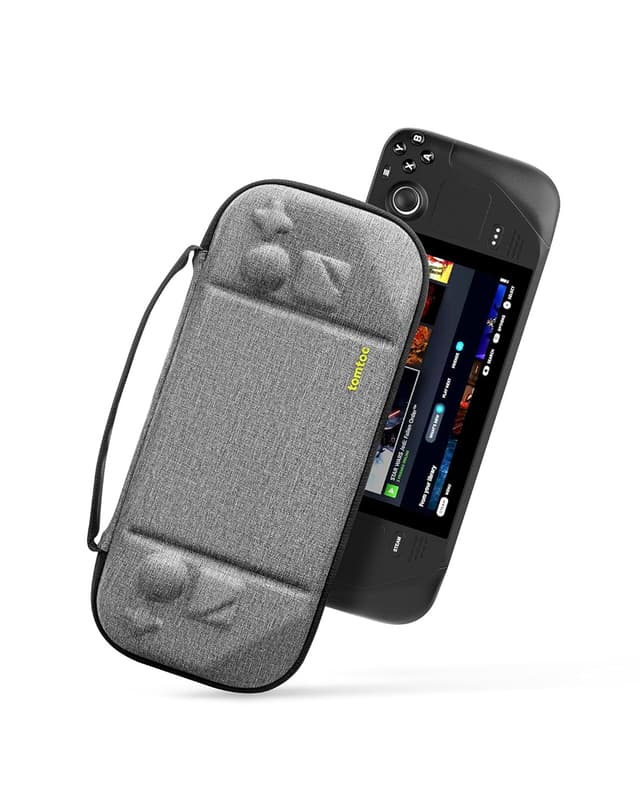
If a hard case on your Steam Deck full time aint for you, then maybe the tomtoc Carrying Case is. It’s substantially smaller than the case the Steam Deck comes with, but still has plenty of protection. I haven’t used one personally, but I’ve heard good things about it online.
The tomtoc Carrying Case is also $29.99 at the time of writing.
Screen Protector
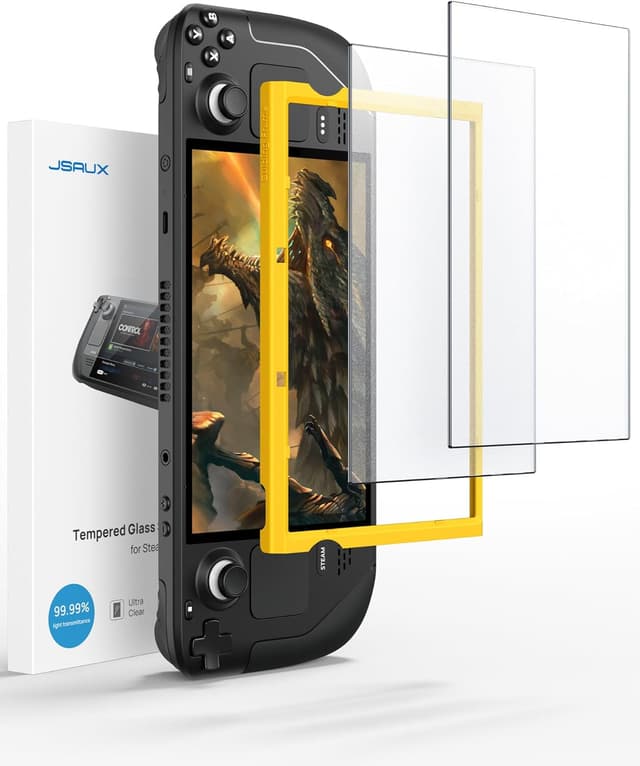
I'm back at it again recomending a JSAUX product. Their screen protector comes in two different flavors, one that's glossy and one that's matte. Personally, I'm team no screen protector, but do as I say, not as I do. I'm living dangerously over here. They both come in a pack of two, so you can mess up once and still have a backup. Not that you will since it comes with a bracket to align the it on your Deck easily.
While writing this, the glossy screen protector is going for $9.99 and the matte screen protector is going for $14.99.
Dock
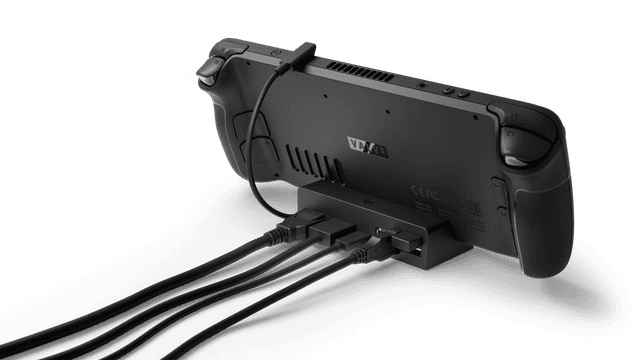
A dock can be a great accessory if you ever plan on plugging anything into your deck. Having only one USB-C port, the deck can’t really use any wired accessories while charging without a dock (save some wired headphones). An alternative to this is any ordinary USB-C dongle. Although this works fine, I’ve never been a fan of the dongle life. You can really buy whatever dock you want here. Personally, I don’t think the official dock is worth $80 but some have said that it has less input lag then its competitors. For that much money you can get a dock with an M.2 slot for extra storage when docked. I’ll list some here to get you started. I prefer the JSAUX ones but really any reputable brand will do. That BenQ one is apparently one of a few that can output 4K at 120fps on the Steam Deck. I have one of them on the way so keep an eye out for a post about it.
| Brand | Price | Features |
|---|---|---|
| JSAUX | $29.99 | 5-in-1, 4K@60Hz |
| JSAUX | $89.99 | 6-in-1, 4K@60Hz, M.2 Slot for extra storage when docked |
| Anker | $29.99 | 6-in-1, 4K@60Hz |
| BenQ | $109.00 | 5-in-1, 4K@120Hz, 2.5GbE |
| Valve | $79.99 | 5-in-1, 4K@60Hz, Power Supply Included, Software Updates |
Battery Bank
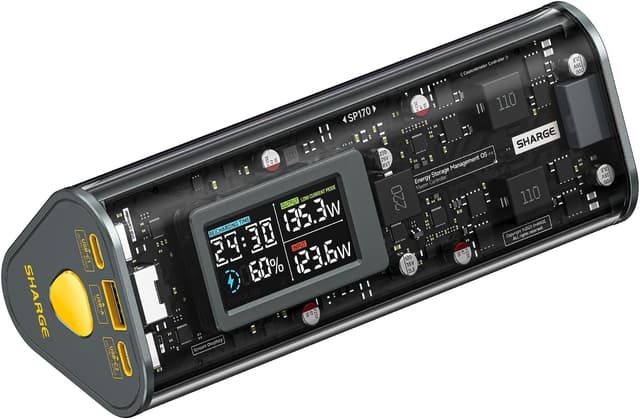
I wouldn't call the Steam Deck's battery life bad, but that's because most of it's competition is worse. Whenever I bring my Deck on a plane, train, or automobile (for a road trip), I always bring a battery bank. I have a 20,000mAh one that can charge my Deck about 2-3 times. I really recoment one if you plan to travel with the Deck. You're looking for a high capacity battery that can deliver 45W or more USB-C PD. I'll list a few here that would work well. I have a previous version of the Baseus one and it's been great for me.
| Brand | Price | Capacity | Output |
|---|---|---|---|
| Baseus | $49.99 | 20,000mAh | 65W |
| UGreen | $66.99 | 20,000mAh | 130W |
| Anker | $55.90 | 20,000mAh | 65W |
| Shargeek | $119.99 (with coupon) | 24,000mAh | 170W |
| CUKTECH | $32.99 (with coupon) | 20,000mAh | 85W |
I have not tried the CUKTECH battery, but I have it on order for testing and will update here once I've tried it.
Controller
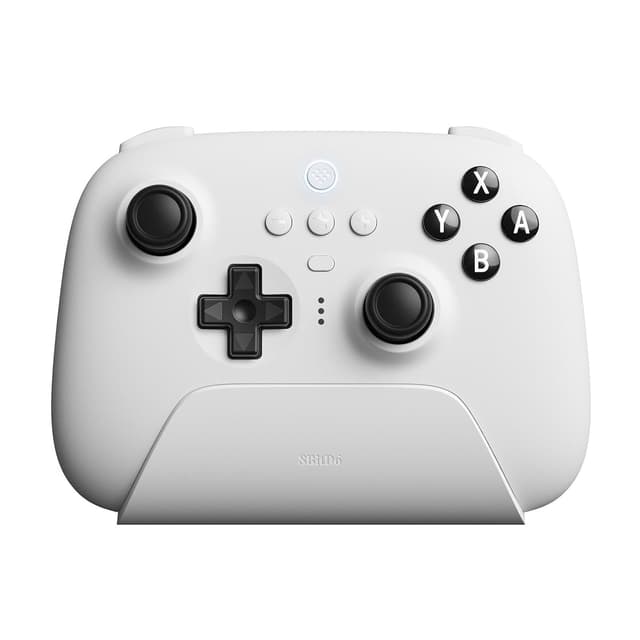
I know the Steam Deck has a controller built in, and that's great for playing on the go, but when the Steam Deck is docked, you need a controller. I've been using the 8BitDo Ultimate Bluetooth, and it might be my favorite controller ever. I'll post some options below, but the great thing about the Steam Deck is that it can use almost any controller. PS5 controller? Check. Xbox? No problem. Switch Joycons? I don't know why you'd want to, but you can.
| Brand/Model | Price |
|---|---|
| 8BitDo Ultimate Bluetooth | $59.99 |
| Xbox Wireless Controller | $59.99 |
| Sony DualSense Controller | $74.90 |
A Little Reminder
The Steam Deck is an incredible device, and you can enjoy it with or without all this stuff. These things elevate my already excellent experience with the Steam Deck, but they may not all do the same for you. Figure out what you want from the device, then come back and install/buy what you need to get there.
If you ever need any help, the community over at r/SteamDeck is great and full of knowledge. Who knows, I might even see your post and be able to help you out myself.
I hope this guide was helpful to you. Over and out.